
PAR MCP Inspector TUI





A comprehensive Terminal User Interface (TUI) application for inspecting and interacting with Model Context Protocol (MCP) servers. This tool provides an intuitive interface to connect to MCP servers, explore their capabilities, and execute tools, prompts, and resources in real-time.

Screenshots
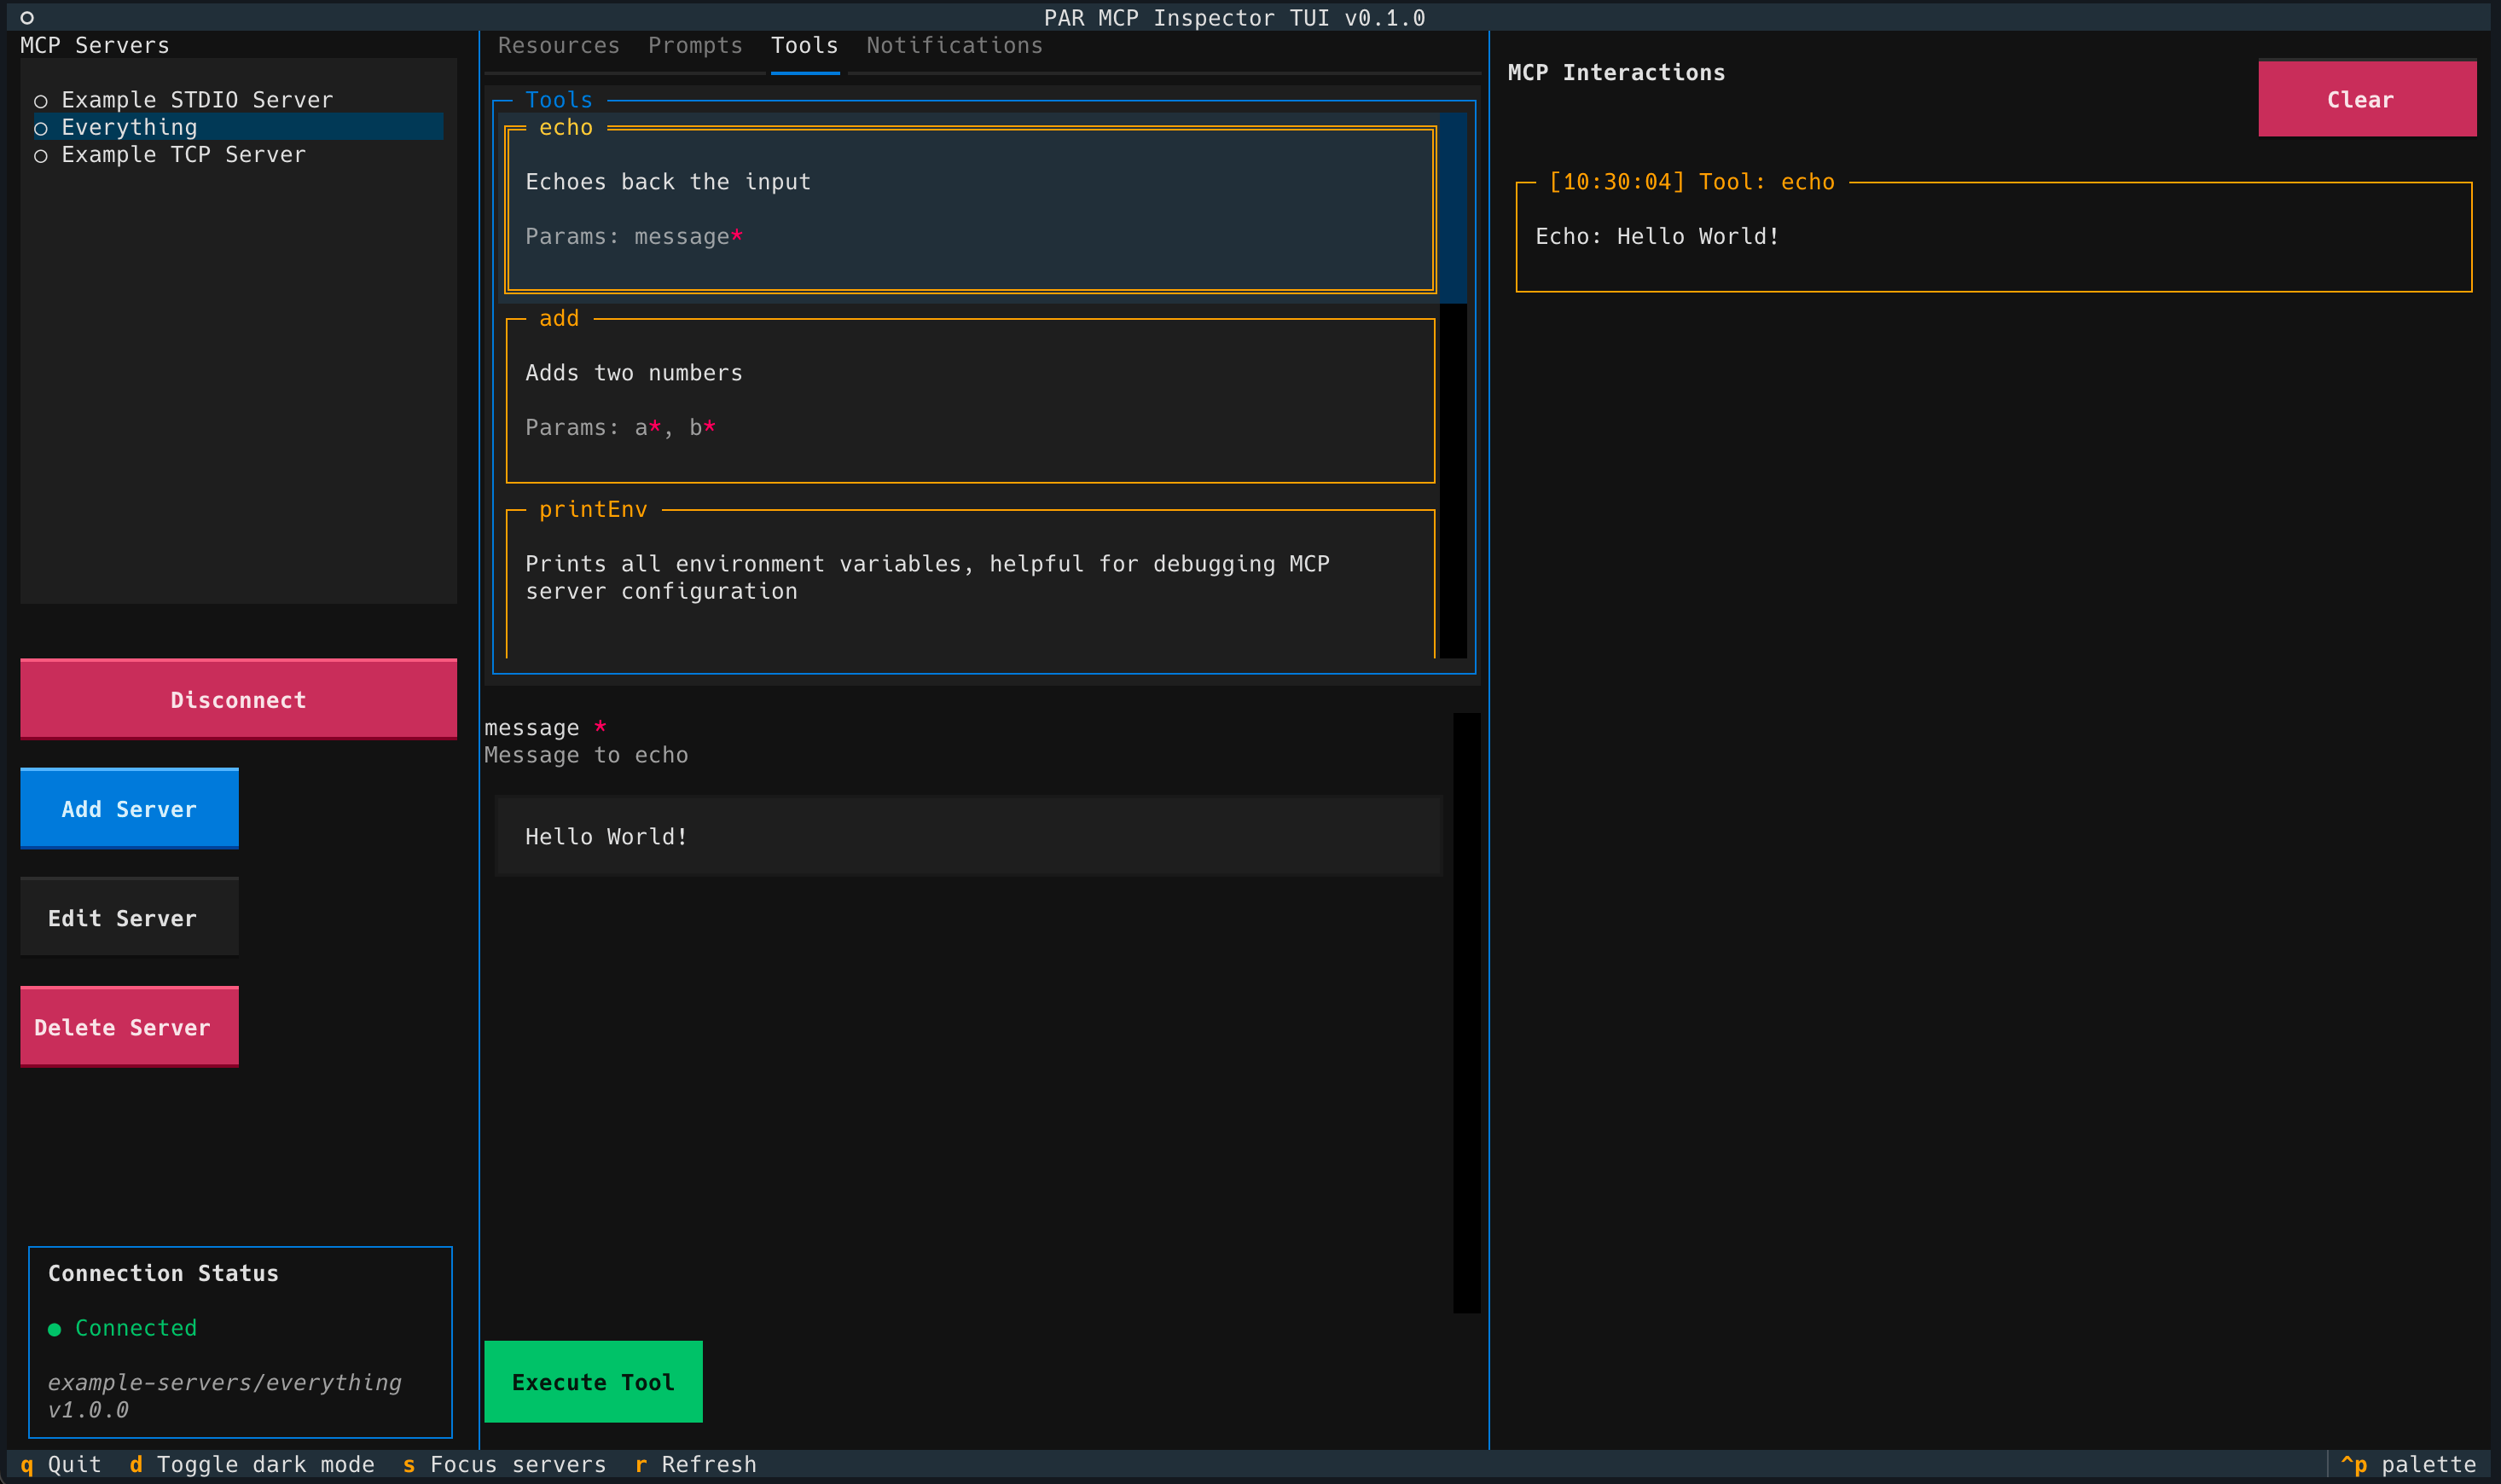
The MCP Inspector TUI showing a connected "Everything" server with available tools (echo, add, printEnv), tool parameter forms, and real-time interaction logs. The interface displays server management on the left, tabbed content areas in the center, and notifications on the right.
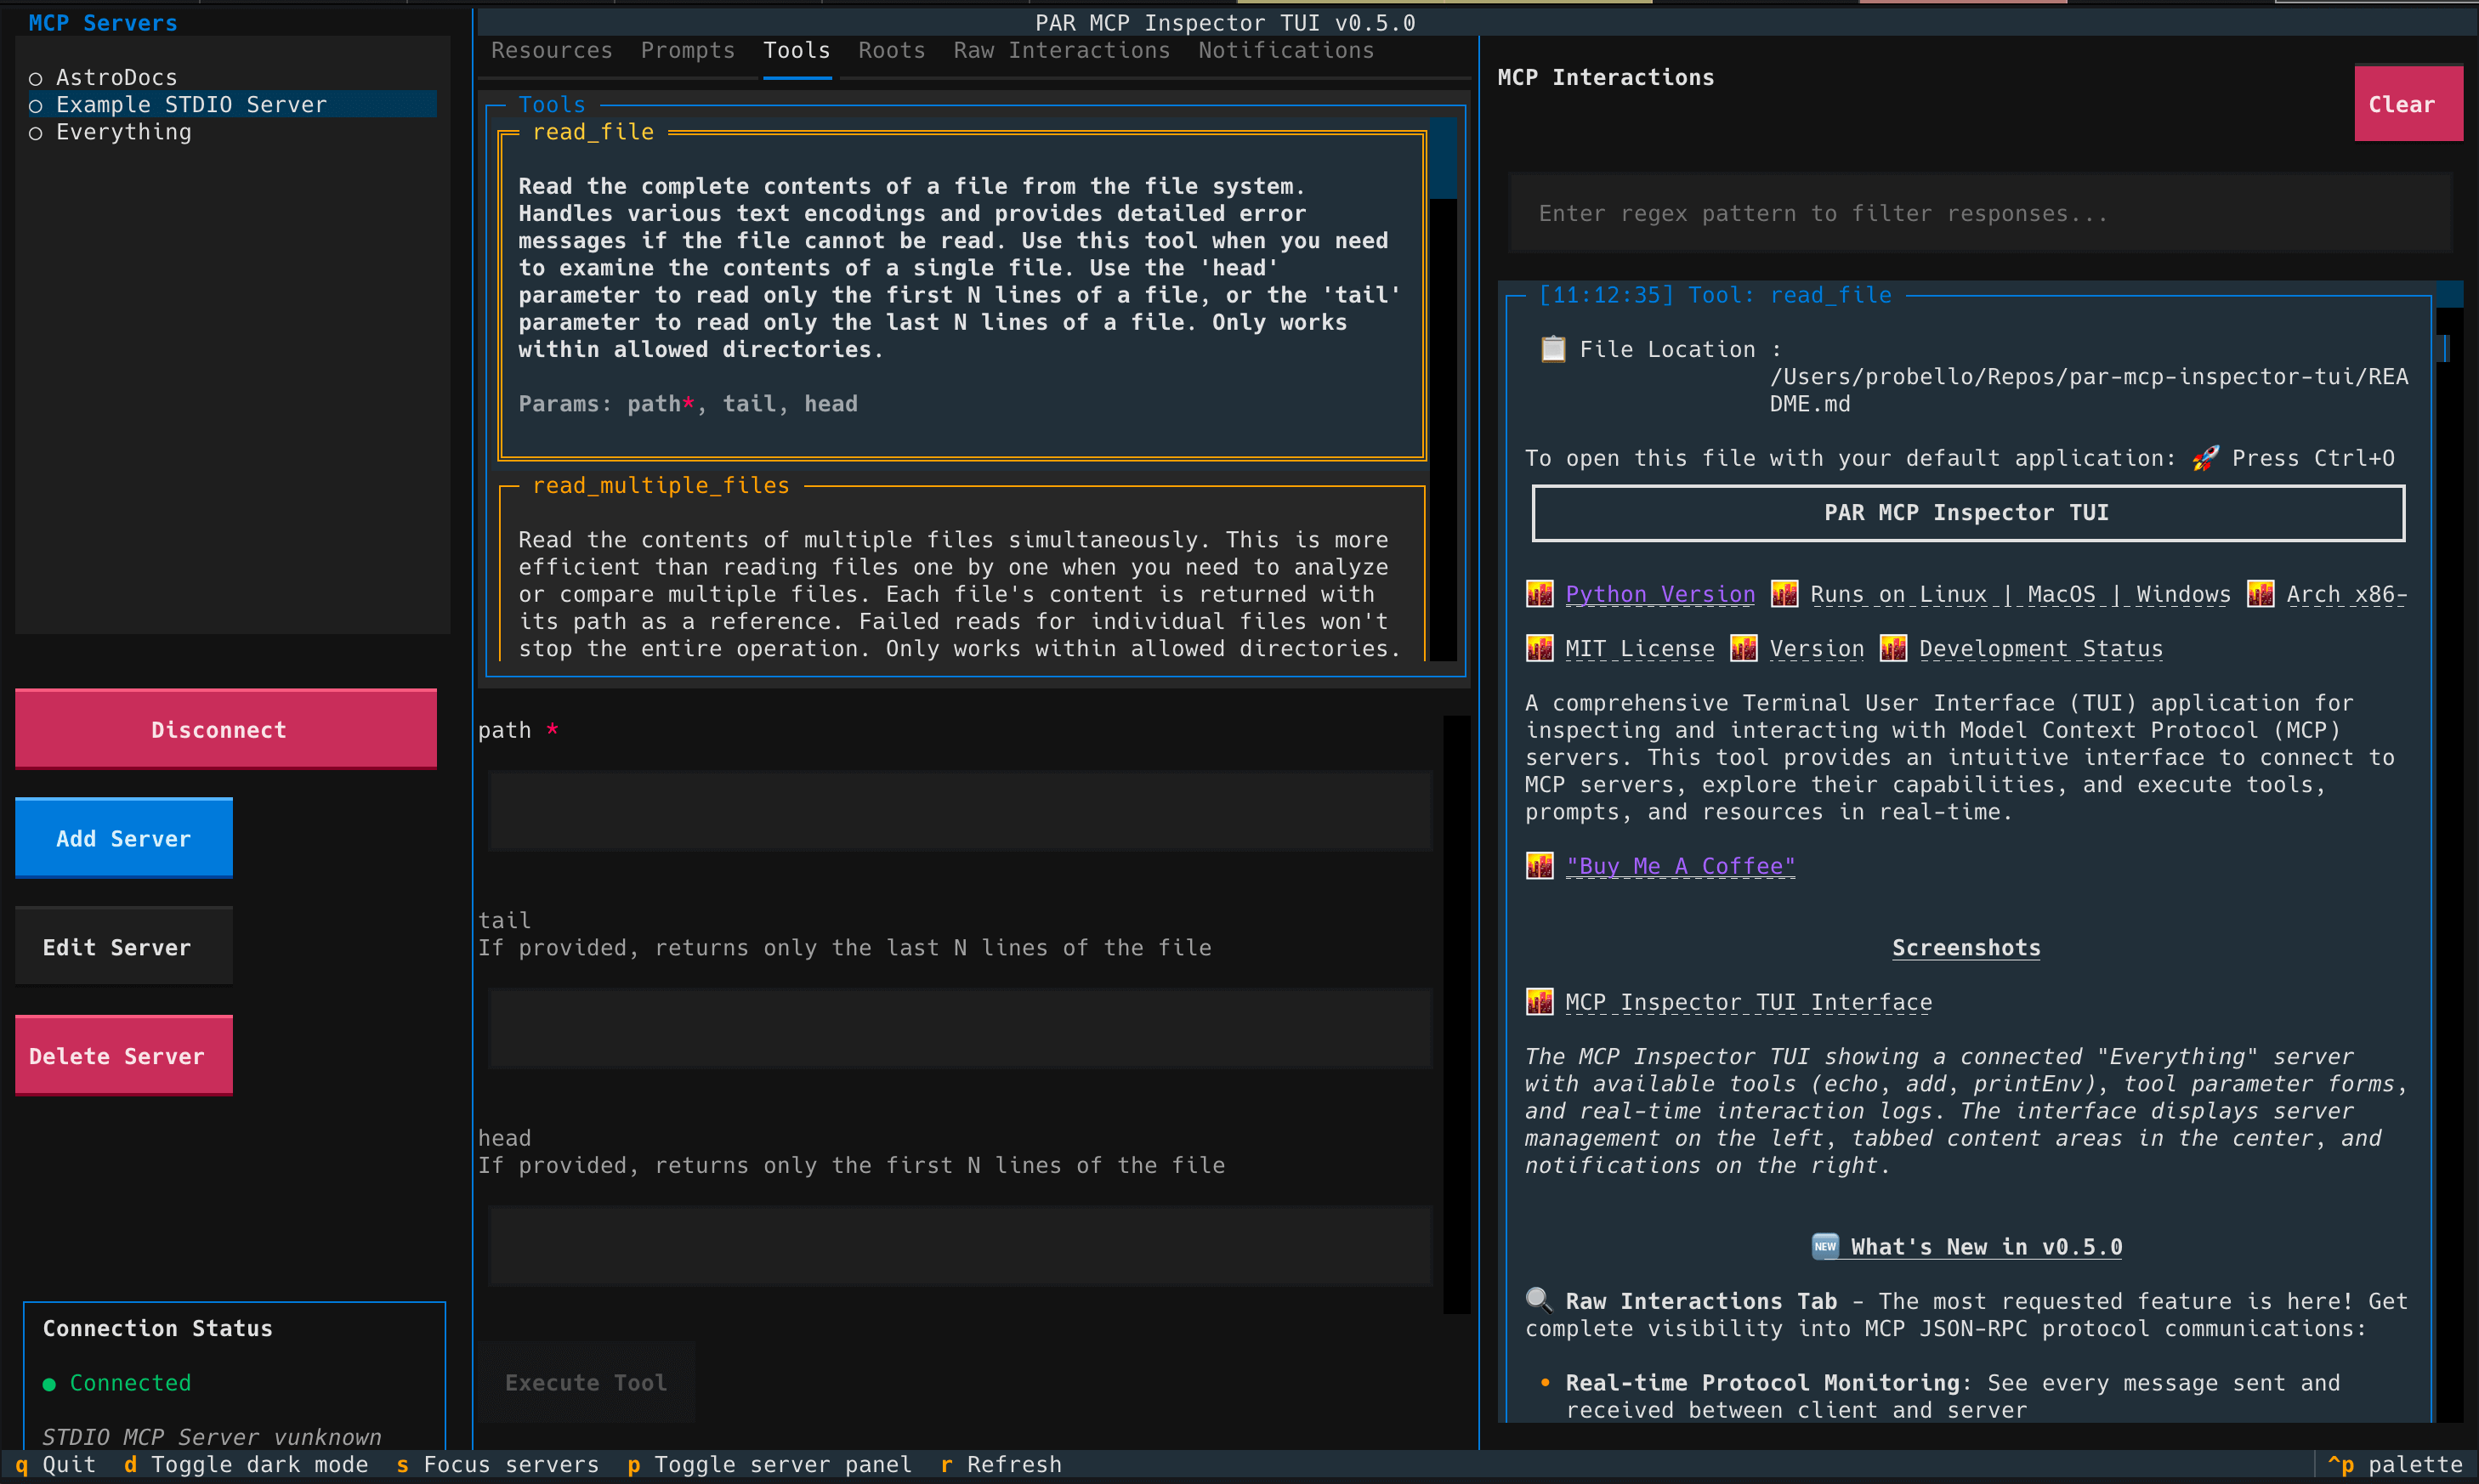
The Raw Interactions tab displaying real-time MCP JSON-RPC protocol messages with syntax highlighting, showing both sent (green) and received (blue) messages with timestamps and comprehensive protocol monitoring capabilities.
🆕 What's New in v0.9.1
🔧 Resource Template Support: The Resources tab now fully supports MCP resource templates.
- Resource templates (parameterized URIs like
user://{user_id}) are displayed alongside static resources with a distinct visual style - Selecting a template shows a dynamic parameter input form — fill in values to construct the URI before reading
- Read button is gated on form validity for templates, enabled immediately for static resources
- Both static resources and templates are fetched concurrently for faster load times
🐛 Bug Fix: Improved JSON serialization for MCP tool and resource responses.
- Fixed issue where complex MCP objects (Pydantic models, CallToolResult) would show generic "tool executed successfully" instead of actual content
- Added robust serialization helper with recursion depth protection
- Improved error reporting when serialization fails
- Better handling of FastMCP-specific response objects
What's New in v0.9.0
🔍 Enhanced Connect Commands: Added --debug-dump flag to all connect commands for comprehensive server debugging.
- New
--debug-dumpFlag: Available forconnect,connect-tcp, andconnect-httpcommands - Full Debug Analysis: Performs complete server inspection like the
debugcommand (lists tools, resources, prompts) - Flexible Testing: Connect to any MCP server with or without full debug output
- Convenient Short Flag: Use
-Dfor quick debug dumps - Consistent Interface: Same debug output format across all connect commands
Examples:
# Connect with full debug dump
pmit connect npx -a "-y" -a "@modelcontextprotocol/server-filesystem" -a "/tmp" --debug-dump

# Quick debug dump with short flag
pmit connect-tcp localhost 3333 -D

# HTTP server with debug analysis
pmit connect-http https://api.example.com/mcp --debug-dump --verbose
What's New in v0.6.0
🔧 Bug Fix: Fixed missing PyYAML dependency that was causing installation issues.
What's New in v0.5.0
🔍 Raw Interactions Tab - The most requested feature is here! Get complete visibility into MCP JSON-RPC protocol communications:
- Real-time Protocol Monitoring: See every message sent and received between client and server
- Rich JSON Display: Syntax-highlighted JSON with color-coded message direction
- Advanced Search: Regex pattern matching across entire message content for powerful debugging
- Universal Compatibility: Works with all MCP servers (STDIO, HTTP, filesystem, etc.)
- Developer Essential: Perfect for MCP server development, debugging, and protocol analysis
🎨 Smart Content Detection & Viewers - Tool results now automatically use appropriate viewers based on content type:
- Intelligent Detection: Automatically detects content type from file extensions, MIME types, and content patterns
- Markdown Rendering:
.mdfiles display with proper formatting, headers, lists, and code blocks - Syntax Highlighting: Code files (.py, .js, .ts, .html, .css, etc.) get language-specific highlighting
- JSON Pretty-Printing: JSON responses are automatically formatted with syntax highlighting
- File Location Integration: File path display with copy button and Ctrl+O quick-open functionality
- 20+ Languages Supported: Python, JavaScript, TypeScript, HTML, CSS, YAML, TOML, and more
Plus: Enhanced clipboard integration, improved search functionality, and critical bug fixes for filesystem servers.
📖 See full changelog for complete details.
Features
- Multiple Transport Support: Connect to MCP servers via STDIO and HTTP+SSE
- MCP Roots Support: Full implementation of MCP filesystem roots protocol with TUI and CLI management
- Raw Interactions Monitoring: Real-time display of all MCP JSON-RPC protocol messages with syntax highlighting
- Smart Content Detection: Automatic content type detection and appropriate viewer selection for tool results
- Enhanced Tool Results Display: File location headers with copy buttons and Ctrl+O quick-open functionality
- Multi-Language Syntax Highlighting: Support for 20+ programming languages and file formats
- Intelligent Markdown Rendering: Automatic detection and rich rendering of Markdown content
- CLI Debugging Tools: Connect to arbitrary servers and inspect interactions without configuration
- Resource Download CLI: Download resources by name with automatic file type detection
- Resource Template Support: Parameterized resource URIs with automatic form generation for template parameters
- Real-time Introspection: Discover tools, prompts, resources, and resource templates from connected servers
- Dynamic Forms: Automatically generated forms based on server-provided schemas with real-time validation
- Form Validation: Smart execute button control - disabled until all required fields are filled
- Magic Number Detection: Automatic file type detection using magic numbers for binary resources
- Advanced Content Viewers: JSON pretty-printing, code syntax highlighting, and markdown rendering
- Regex Search: Real-time filtering of MCP responses and raw interactions with regex pattern matching
- File Management: Save and open resources with proper file extensions and MIME type handling
- Server Management: Persistent configuration storage for multiple server connections
- Non-blocking Operations: Async communication ensuring responsive UI
- Server Notifications: Real-time notifications from MCP servers with auto-refresh capabilities
- Application Notifications: Real-time status updates and error handling
- Tab Auto-clearing: Automatically clears all tabs when disconnecting from servers
- Capability-aware: Gracefully handles servers with partial MCP implementation
Technology Stack
- Python 3.11+ - Modern Python with latest features
- FastMCP - High-performance Model Context Protocol implementation with robust transport layer
- Textual - Beautiful, responsive terminal user interfaces
- Pydantic - Data validation and serialization
- Rich - Terminal output formatting and syntax highlighting
- filetype - Magic number file type detection
- YAML - Configuration file format
- Asyncio - Asynchronous programming for responsive interfaces
Prerequisites
To install PAR MCP Inspector TUI, make sure you have Python 3.11+.
uv is recommended
Linux and Mac
curl -LsSf https://astral.sh/uv/install.sh | sh
Windows
powershell -ExecutionPolicy ByPass -c "irm https://astral.sh/uv/install.ps1 | iex"
Installation
Installation from PyPI (Recommended)
Install the latest stable version using uv:
uv tool install par-mcp-inspector-tui
Or using pip:
pip install par-mcp-inspector-tui
After installation, you can run the tool directly:
# Launch the TUI application
pmit tui

# Show all available commands
pmit --help
Installation From Source
For development or to get the latest features:
-
Clone the repository:
git clone https://github.com/paulrobello/par-mcp-inspector-tui.git cd par-mcp-inspector-tui -
Install the package dependencies using uv:
uv sync -
Run using uv:
uv run pmit tui
Usage
CLI Commands Overview
If installed from PyPI:
# Show all available commands
pmit --help

# Show version information
pmit --version

# Launch the TUI application
pmit tui

# Launch TUI with debug mode
pmit tui --debug

# List configured servers
pmit servers

# Debug a configured server
pmit debug <server-id> --verbose

# Connect to arbitrary STDIO server
pmit connect npx --arg "-y" --arg "@modelcontextprotocol/server-filesystem" --arg "/tmp"

# Connect with debug dump for full server analysis
pmit connect npx --arg "-y" --arg "@modelcontextprotocol/server-filesystem" --arg "/tmp" --debug-dump

# Connect to arbitrary TCP server
pmit connect-tcp localhost 3333

# Connect to TCP server with debug dump
pmit connect-tcp localhost 3333 --debug-dump

# Download resources from servers
pmit download-resource <server-id> <resource-name>

# Manage filesystem roots for servers
pmit roots-list [server-id]
pmit roots-add <server-id> <path>
pmit roots-remove <server-id> <path>

# Copy server configurations to clipboard
pmit copy-config <server-id-or-name> [--format desktop|code]
pmit copy-desktop <server-id-or-name>
pmit copy-code <server-id-or-name>
If running from source:
# Show all available commands
uv run pmit --help

# Show version information
uv run pmit --version

# Launch the TUI application
uv run pmit tui

# Launch TUI with debug mode
uv run pmit tui --debug

# List configured servers
uv run pmit servers

# Debug a configured server
uv run pmit debug <server-id> --verbose

# Connect to arbitrary STDIO server
uv run pmit connect npx --arg "-y" --arg "@modelcontextprotocol/server-filesystem" --arg "/tmp"

# Connect to arbitrary TCP server
uv run pmit connect-tcp localhost 3333

# Download resources from servers
uv run pmit download-resource <server-id> <resource-name>

# Manage filesystem roots for servers
uv run pmit roots-list [server-id]
uv run pmit roots-add <server-id> <path>
uv run pmit roots-remove <server-id> <path>

# Copy server configurations to clipboard
uv run pmit copy-config <server-id-or-name> [--format desktop|code]
uv run pmit copy-desktop <server-id-or-name>
uv run pmit copy-code <server-id-or-name>
TUI Application
# Start the MCP Inspector TUI (if installed from PyPI)
pmit tui

# Enable debug mode for troubleshooting
pmit tui --debug

# If running from source
uv run pmit tui
uv run pmit tui --debug
Options:
--debug -d: Enable debug mode for detailed logging and troubleshooting
First Time Setup
- Launch the application:
pmit tui(oruv run pmit tuiif running from source) - Default servers: The application comes with working example server configurations:
- Example STDIO Server: Filesystem server for
/tmpdirectory - Everything: Comprehensive test server with tools, resources, and notifications
- Example STDIO Server: Filesystem server for
- Add your servers: Use the "Add Server" button to configure your MCP servers
- Connect: Select a server from the list and click "Connect"
- Explore: Browse resources, prompts, and tools in the tabbed interface
Quick Testing without Configuration
Test any MCP server instantly without adding it to configuration:
# Test a filesystem server
uv run pmit connect npx \
  --arg "-y" \
  --arg "@modelcontextprotocol/server-filesystem" \
  --arg "/tmp" \
  --name "My Test Server" \
  --verbose

# Test with environment variables
uv run pmit connect python \
  --arg "my_server.py" \
  --env "DEBUG=1" \
  --env "DATABASE_URL=sqlite:///test.db"

# Test TCP server
uv run pmit connect-tcp myhost.com 8080 --verbose
CLI Commands Reference
Global Options
--version -v: Show version and exit--help: Show help message and exit
tui - Launch TUI Application
# If installed from PyPI
pmit tui [OPTIONS]

# If running from source
uv run pmit tui [OPTIONS]
Options:
--debug -d: Enable debug mode for detailed logging and troubleshooting
servers - List Configured Servers
# If installed from PyPI
pmit servers

# If running from source
uv run pmit servers
Shows a formatted table of all configured MCP servers with their connection details and status.
debug - Debug Configured Server
# If installed from PyPI
pmit debug <server-id-or-name> [OPTIONS]

# If running from source
uv run pmit debug <server-id-or-name> [OPTIONS]
Arguments:
server-id-or-name: Server ID or name to debug (required)
Options:
--verbose -v: Verbose output with raw JSON--debug: Enable debug logging of MCP messages
Connect to a pre-configured server and test all MCP endpoints:
- Shows server information and capabilities
- Tests resources, tools, and prompts endpoints with enhanced display
- Enhanced Resource Display: Color-coded labels and ready-to-use download commands
- Displays detailed error information
- Use
--verbosefor raw JSON responses - Use
--debugfor detailed MCP message logging
Enhanced Resource Display Features:
- Resource Names: Clearly highlighted for use with
download-resourcecommand - Download Instructions: Exact command syntax for configured servers
- Color-Coded Output: Green names, cyan URIs, yellow descriptions, magenta MIME types
- Smart Guidance: Different messages for configured vs temporary servers
connect - Connect to Arbitrary STDIO Server
# If installed from PyPI
pmit connect <command> [OPTIONS]

# If running from source
uv run pmit connect <command> [OPTIONS]
Arguments:
command: Command to execute for STDIO transport (required)
Options:
--arg -a: Command arguments (can be specified multiple times)--env -e: Environment variables in KEY=VALUE format (can be specified multiple times)--verbose -v: Verbose output with raw JSON--debug: Enable debug logging of MCP messages--debug-dump -D: Perform debug dump like the debug command (lists tools, resources, prompts)--name -n: Server name for display (default: Ad-hoc Server)
Connect to an arbitrary STDIO server without adding it to configuration. With --debug-dump, uses the same enhanced debug output as the debug command, including:
- Color-coded resource display with download guidance
- Smart messaging: Informs users to add server to configuration before downloading resources
- Full MCP testing: Resources, tools, and prompts endpoints
- Flexible Output: Basic connection info without
--debug-dump, full analysis with it
Examples:
# Basic usage (PyPI installation)
pmit connect npx -a "-y" -a "@modelcontextprotocol/server-filesystem" -a "/tmp"

# With environment variables and custom name
pmit connect python -a "server.py" -e "DEBUG=1" -e "PORT=8080" -n "My Server"

# Verbose output with debug logging
pmit connect node -a "server.js" --verbose --debug

# With debug dump for full server analysis
pmit connect node -a "server.js" --debug-dump --verbose

# From source
uv run pmit connect npx -a "-y" -a "@modelcontextprotocol/server-filesystem" -a "/tmp"
connect-tcp - Connect to Arbitrary TCP Server
# If installed from PyPI
pmit connect-tcp [HOST] [PORT] [OPTIONS]

# If running from source
uv run pmit connect-tcp [HOST] [PORT] [OPTIONS]
Arguments:
host: Host to connect to (default: localhost)port: Port to connect to (default: 3333)
Options:
--verbose -v: Verbose output with raw JSON--debug: Enable debug logging of MCP messages--debug-dump -D: Perform debug dump like the debug command (lists tools, resources, prompts)--name -n: Server name for display (default: TCP Server)
Connect to an arbitrary TCP server without adding it to configuration. With --debug-dump, uses the same enhanced debug output as other debug commands, including:
- Enhanced resource listing with color-coded display
- Download guidance: Instructions to add server to configuration first
- Complete testing: All MCP endpoints (resources, tools, prompts)
- Flexible Output: Basic connection info without
--debug-dump, full analysis with it
Examples:
# Default host and port (PyPI installation)
pmit connect-tcp

# Custom host and port with verbose and debug output
pmit connect-tcp example.com 8080 -n "Remote Server" --verbose --debug

# With debug dump for comprehensive analysis
pmit connect-tcp example.com 8080 -n "Remote Server" --debug-dump

# From source
uv run pmit connect-tcp
uv run pmit connect-tcp example.com 8080 -n "Remote Server" --verbose --debug
download-resource - Download Resources by Name
# If installed from PyPI
pmit download-resource <server-id-or-name> <resource-name> [OPTIONS]

# If running from source
uv run pmit download-resource <server-id-or-name> <resource-name> [OPTIONS]
Arguments:
server-id-or-name: Server ID or name to download from (required)resource-name: Resource name to download (required)
Options:
--output -o: Output directory (default: current directory)--filename -f: Custom filename (default: auto-detect from resource)--verbose -v: Verbose output with detailed information--debug: Enable debug logging of MCP messages
Features:
- Smart Resource Finding: Exact name match, case-insensitive fallback, and partial matching
- Automatic File Type Detection: Uses MIME types and magic number detection for proper extensions
- Custom Output: Specify output directory and custom filenames
- Error Handling: Clear error messages for missing servers/resources
Examples:
# Download resource with auto-detection (PyPI installation)
pmit download-resource Everything "Resource 1"

# Custom output directory
pmit download-resource filesystem-server "config.json" --output ~/Downloads

# Custom filename with verbose output
pmit download-resource Everything "Resource 2" --filename my-file.txt --verbose

# Download binary resource (automatic type detection)
pmit download-resource image-server "logo.png" --output ./assets

# From source
uv run pmit download-resource Everything "Resource 1"
roots-list - List Filesystem Roots
# If installed from PyPI
pmit roots-list [SERVER_ID] [OPTIONS]

# If running from source
uv run pmit roots-list [SERVER_ID] [OPTIONS]
Arguments:
server-id: Server ID (optional - uses current connected server if not specified)
Options:
--verbose -v: Show detailed root information including path validation and type
Features:
- Automatic Server Detection: If no server ID provided, uses the currently connected server
- Path Validation: Shows ✓ for existing paths, ✗ for missing paths
- Type Detection: Displays whether paths are directories or files (with
--verbose) - URI Support: Handles both local paths and
file://URIs - Clear Display: Numbered list with status indicators
Examples:
# List roots for connected server (PyPI installation)
pmit roots-list

# List roots for specific server with details
pmit roots-list my-server-id --verbose

# From source
uv run pmit roots-list
uv run pmit roots-list my-server-id --verbose
roots-add - Add Filesystem Root
# If installed from PyPI
pmit roots-add <server-id> <path> [OPTIONS]

# If running from source
uv run pmit roots-add <server-id> <path> [OPTIONS]
Arguments:
server-id: Server ID (required)path: Filesystem path orfile://URI to add as root (required)
Options:
--name -n: Display name for the root (used in TUI interface)
Features:
- Automatic URI Conversion: Converts local paths to proper
file://URIs - Duplicate Prevention: Prevents adding the same root path multiple times
- Path Resolution: Automatically resolves relative paths to absolute paths
- Persistent Storage: Saves roots to server configuration immediately
- Display Name Support: Optional display names for better TUI presentation
Examples:
# Add current directory as root (PyPI installation)
pmit roots-add my-server-id . --name "Project Root"

# Add absolute path
pmit roots-add my-server-id /home/user/documents

# Add with file:// URI
pmit roots-add my-server-id file:///tmp/workspace --name "Workspace"

# From source
uv run pmit roots-add my-server-id . --name "Project Root"
uv run pmit roots-add my-server-id /home/user/documents
roots-remove - Remove Filesystem Root
# If installed from PyPI
pmit roots-remove <server-id> <path>

# If running from source
uv run pmit roots-remove <server-id> <path>
Arguments:
server-id: Server ID (required)path: Filesystem path orfile://URI to remove (required)
Features:
- Flexible Path Matching: Accepts both local paths and
file://URIs - Automatic URI Conversion: Converts local paths to URIs for matching
- Path Resolution: Resolves relative paths to match stored absolute paths
- Not Found Handling: Shows available roots if specified path not found
- Immediate Persistence: Updates server configuration immediately
Examples:
# Remove by local path (PyPI installation)
pmit roots-remove my-server-id /tmp/workspace

# Remove by file:// URI
pmit roots-remove my-server-id file:///home/user/documents

# Remove relative path (resolved automatically)
pmit roots-remove my-server-id ../parent-dir

# From source
uv run pmit roots-remove my-server-id /tmp/workspace
uv run pmit roots-remove my-server-id file:///home/user/documents
copy-config - Copy Server Configuration (Universal)
# If installed from PyPI
pmit copy-config <server-id-or-name> [OPTIONS]

# If running from source
uv run pmit copy-config <server-id-or-name> [OPTIONS]
Arguments:
server-id-or-name: Server ID or name to copy configuration for (required)
Options:
--format -f: Config format (desktop|code) - default: desktop
Features:
- Dual Format Support: Copy configurations for Claude Desktop or Claude Code
- Server Lookup: Accepts both server ID and server name (case-insensitive)
- Error Handling: Shows available servers if specified server not found
- Preview Output: Shows copied content when run in terminal
- Format Shortcuts: Supports "d" for desktop and "c" for code
Examples:
# Copy for Claude Desktop (default format) - PyPI installation
pmit copy-config "Example STDIO Server"

# Copy for Claude Code using format option
pmit copy-config "filesystem-server" --format code

# Use format shortcuts
pmit copy-config "Everything" -f c

# Use server ID instead of name
pmit copy-config a49a17c3-a91c-4757-8ec8-effa589fffa1 --format desktop

# From source
uv run pmit copy-config "Example STDIO Server"
uv run pmit copy-config "filesystem-server" --format code
copy-desktop - Copy Claude Desktop Configuration
# If installed from PyPI
pmit copy-desktop <server-id-or-name>

# If running from source
uv run pmit copy-desktop <server-id-or-name>
Arguments:
server-id-or-name: Server ID or name to copy configuration for (required)
Features:
- Claude Desktop Format: Generates config.json format for Claude Desktop MCP configuration
- Complete Transport Support: Handles STDIO, TCP, and HTTP transport configurations
- Environment Variables: Includes all environment variables and command arguments
- Immediate Clipboard: Automatically copies to system clipboard
- Preview Display: Shows the copied JSON configuration in terminal
Examples:
# Copy STDIO server config for Claude Desktop - PyPI installation
pmit copy-desktop "Example STDIO Server"

# Copy HTTP server config using server ID
pmit copy-desktop 47221007-90ba-4c6f-8dce-a5167f819309

# From source
uv run pmit copy-desktop "Example STDIO Server"
uv run pmit copy-desktop "Everything"
Output Format:
{
  "Example STDIO Server": {
    "command": "npx",
    "args": ["-y", "@modelcontextprotocol/server-filesystem", "/tmp"],
    "env": {
      "NODE_ENV": "production"
    }
  }
}
copy-code - Copy Claude Code MCP Add Command
# If installed from PyPI
pmit copy-code <server-id-or-name>

# If running from source
uv run pmit copy-code <server-id-or-name>
Arguments:
server-id-or-name: Server ID or name to copy configuration for (required)
Features:
- Claude Code Format: Generates
claude mcp addcommand syntax - STDIO Support: Full support for STDIO transport with command and arguments
- Transport Limitations: Shows helpful comments for TCP/HTTP transports (not directly supported)
- Ready to Execute: Command can be run directly in terminal
- Complete Syntax: Includes server name, command, and all arguments
Examples:
# Copy MCP add command for Claude Code - PyPI installation
pmit copy-code "Example STDIO Server"

# Copy using server ID
pmit copy-code 90ab905f-dc7c-48f1-8696-5b43a609d549

# From source
uv run pmit copy-code "Example STDIO Server"
uv run pmit copy-code "Everything"
Output Format:
# For STDIO servers
claude mcp add "Example STDIO Server" -- npx -y @modelcontextprotocol/server-filesystem /tmp

# For TCP servers (with helpful comments)
claude mcp add "TCP Server" -- # TCP transport not directly supported in claude mcp add # Host: localhost # Port: 3333

# For HTTP servers (with helpful comments)
claude mcp add "HTTP Server" -- # HTTP transport not directly supported in claude mcp add # URL: https://api.example.com/mcp
Server Configuration
The TUI application stores server configurations in ~/.config/par-mcp-inspector-tui/servers.yaml. Example configuration:
servers:
  filesystem-server:
    name: "Filesystem Server"
    transport: "stdio"
    command: "npx"
    args:
      - "-y"
      - "@modelcontextprotocol/server-filesystem"
      - "/tmp"
    env:
      NODE_ENV: "production"
    toast_notifications: true  # Show toast notifications (default: true)
    roots:  # MCP filesystem roots (optional)
      - "file:///tmp"
      - "file:///home/user/documents"
      - "file:///var/log"

  http-mcp-server:
    name: "HTTP MCP Server"
    transport: "http"
    url: "https://api.example.com/mcp"
    toast_notifications: true  # Show toast notifications for this server
    roots:  # Roots can be specified for any transport type
      - "file:///workspace/project"
      - "file:///shared/resources"
Configuration Options
-
toast_notifications (boolean, default: true): Controls whether to show toast popup notifications when the server sends notifications. When
false, notifications are still added to the notifications tab but won't show as toast popups. Note: Toasts are automatically suppressed when viewing the notifications tab regardless of this setting. -
roots (array of strings, optional): List of filesystem roots that define the boundaries of filesystem access for MCP servers. Each root should be a
file://URI pointing to a directory or file. These roots are sent to the server during connection to establish filesystem boundaries according to the MCP roots protocol. Roots can be managed through the TUI interface (Roots tab) or via CLI commands (roots-add,roots-remove,roots-list).
UI Configuration
You can configure toast notifications through the TUI interface:
- Add Server Dialog: When adding a new server, check/uncheck "Show toast notifications from this server"
- Edit Server Dialog: Select any server and click "Edit Server" to modify the toast notification setting
- Per-Server Control: Each server has different notification settings
- Real-time Updates: Changes take effect immediately after saving
Supported Transport Types
STDIO Transport (Recommended)
For servers that communicate via standard input/output (most common):
servers:
  my-stdio-server:
    name: "My STDIO Server"
    transport: "stdio"
    command: "python"
    args:
      - "server.py"
    env:
      DEBUG: "1"
HTTP Transport
For HTTP-based MCP servers with SSE (Server-Sent Events) support:
servers:
  my-http-server:
    name: "My HTTP MCP Server"
    transport: "http"
    url: "https://api.example.com/mcp"
TCP Transport (Legacy HTTP+SSE)
For backward compatibility with HTTP-based MCP servers:
servers:
  my-tcp-server:
    name: "My TCP Server"
    transport: "tcp"
    host: "localhost"
    port: 8080
Important Notes:
- STDIO transport is recommended for most MCP servers (filesystem, everything, etc.)
- HTTP transport is for servers with full HTTP URLs
- TCP transport actually uses HTTP+SSE protocol, not raw TCP sockets
- Use HTTP/TCP transports only for servers that explicitly support HTTP+SSE protocol
User Interface
Main Layout
- Docked Server Panel: Toggleable left sidebar for server management
- Docked Position: Anchored to the left side of the interface
- Toggle Control: Press
pto show/hide the panel - Default State: Opens visible by default
- Contents: Server list and connection status
- Persistent Functionality: All server management features remain available when hidden/shown
- Center Panel: Tabbed interface with:
- Resources: Browse and read available resources and resource templates (with parameter forms)
- Prompts: Execute prompts with dynamic argument forms and validation
- Tools: Call tools with smart parameter validation and form controls
- Roots: Manage filesystem roots for MCP server access boundaries
- Raw Interactions: Real-time display of MCP JSON-RPC protocol messages with syntax highlighting and regex search
- Notifications: Real-time server notifications with auto-refresh capabilities
- Right Panel: Response viewer with formatted output and syntax highlighting
Form Validation Features
- Required Field Indicators: Red asterisks (*) mark required parameters
- Smart Execute Button: Automatically disabled when required fields are empty
- Real-time Validation: Button state updates as you type in form fields
- Array Field Support: Add/remove dynamic list items with validation
- Multiple Field Types: Text, number, checkbox, select, and array inputs
Server Notifications Features
- Real-time Updates: Receive notifications from MCP servers as they happen
- Auto-refresh: Automatically refresh tools, resources, and prompts when server lists change
- Server Context: Each notification shows which server sent it
- Message Types: Supports different notification types:
notifications/tools/list_changed- Tools list has changednotifications/resources/list_changed- Resources list has changednotifications/prompts/list_changed- Prompts list has changednotifications/message- General server messages with level indicators
- Visual Distinction: Server notifications have unique styling and icons (🔔)
- Chronological Order: Newest notifications appear at the top
- Notification History: View complete history of server communications
- Toast Control: Per-server configuration for toast popup notifications
- Enable/disable through Add/Edit Server dialogs
- Automatic suppression when viewing notifications tab
- Real-time configuration updates without restart
Filesystem Roots Management
The Roots tab provides comprehensive management of filesystem boundaries for MCP servers:
Root Management Features:
- Add New Roots: Click "Add Root" to add filesystem paths or
file://URIs - Remove Roots: Select roots and click "Remove Root" to delete them
- Path Validation: Real-time status indicators show if root paths exist (✓/✗)
- Type Display: Shows whether roots are directories, files, or URIs
- Server Integration: Roots are automatically sent to servers during connection
- Persistent Storage: Root configurations are saved with server settings
Root Display Format:
- Status Indicator: ✓ (exists), ✗ (missing), or ? (unknown)
- Path Information: Shows the full
file://URI or local path - Type Information: (directory), (file), or (URI) designations
- Organized List: Clean, numbered display of all configured roots
MCP Protocol Integration:
- Automatic Transmission: Roots are sent to servers during connection establishment
- Protocol Compliance: Implements MCP
roots/listprotocol specification - Boundary Enforcement: Servers use roots to restrict filesystem access
- Notification Support: Responds to
notifications/roots/list_changedfrom servers
Raw Interactions Monitoring
The Raw Interactions tab provides comprehensive monitoring of all MCP JSON-RPC protocol messages:
Interaction Display Features:
- Real-time Capture: Automatically captures all sent and received messages during server communication
- Syntax Highlighting: Rich JSON formatting with color-coded syntax highlighting
- Message Direction: Visual distinction between sent (green theme) and received (blue theme) messages
- Timestamps: Precise timestamps (HH:MM:SS.ms) for each interaction
- Chronological Order: Newest interactions appear at the top
Search and Filtering:
- Regex Search: Real-time filtering with regex pattern matching
- Full-text Search: Search across entire JSON message content
- Graceful Fallback: Invalid regex patterns fall back to simple string search
- Pattern Highlighting: Search matches are highlighted within the JSON content
Technical Features:
- Memory Management: Automatically limits to 200 interactions to prevent memory issues
- Performance Optimized: Efficient display updates without blocking the UI
- Error Handling: Graceful handling of malformed JSON or connection issues
- Protocol Coverage: Captures all MCP operations including:
- Connection handshake and initialization
- Resource/tool/prompt listing operations
- Tool execution and resource reading
- Server notifications and responses
- Error messages and protocol exceptions
Use Cases:
- Protocol Debugging: Understand exactly what messages are being exchanged
- Server Development: Validate MCP server implementations
- Performance Analysis: Monitor response times and message patterns
- Troubleshooting: Identify communication issues between client and server
Server Management
Add/Edit Server Dialog
The server configuration dialog provides comprehensive settings for MCP servers:
Basic Configuration:
- Server Name: Descriptive name for identification
- Transport Type: Choose between STDIO or TCP communication
STDIO Transport Settings:
- Command: Executable command (e.g.,
python,npx,node) - Arguments: Command-line arguments (one per line)
- Environment Variables: KEY=value pairs (one per line)
HTTP Transport Settings:
- URL: Complete HTTP/HTTPS URL to the MCP server endpoint
TCP Transport Settings (Legacy):
- Host: Server hostname or IP address
- Port: Network port number (1-65535)
Notification Settings:
- Toast Notifications Checkbox: Control popup notifications for this server
- ✅ Checked (default): Display toast popups + notifications tab
- ❌ Unchecked: Notifications tab only (quiet mode)
- 🎯 Smart Behavior: Toasts auto-suppressed when viewing notifications tab
Dialog Features:
- Real-time form validation with helpful error messages
- Dynamic sections based on transport type selection
- Persistent settings with immediate effect after save
- Maintains UI selection state after edits
Keyboard Shortcuts
q- Quit applicationd- Toggle dark/light modes- Focus server panel (when visible)p- Toggle server panel visibilityr- Refresh server dataCtrl+O- Open last saved resource file (when viewing resources)
Testing with MCP Servers
Example Servers for Testing
Test these official MCP servers using the CLI commands:
-
Filesystem Server:
# Using CLI connect (PyPI installation) pmit connect npx \ -a "-y" -a "@modelcontextprotocol/server-filesystem" -a "/tmp" \ --verbose # From source uv run pmit connect npx \ -a "-y" -a "@modelcontextprotocol/server-filesystem" -a "/tmp" \ --verbose # Direct command for reference npx -y @modelcontextprotocol/server-filesystem /tmp -
SQLite Server:
# Using CLI connect (PyPI installation) pmit connect npx \ -a "-y" -a "@modelcontextprotocol/server-sqlite" \ -a "--db-path" -a "test.db" \ --verbose # From source uv run pmit connect npx \ -a "-y" -a "@modelcontextprotocol/server-sqlite" \ -a "--db-path" -a "test.db" \ --verbose # Direct command for reference npx -y @modelcontextprotocol/server-sqlite --db-path test.db -
Custom Python Server:
# Test your custom server (PyPI installation) pmit connect python \ -a "my_mcp_server.py" \ -e "DATABASE_URL=sqlite:///data.db" \ -n "My Custom Server" \ --verbose # From source uv run pmit connect python \ -a "my_mcp_server.py" \ -e "DATABASE_URL=sqlite:///data.db" \ -n "My Custom Server" \ --verbose -
GitHub MCP Server:
# Test GitHub integration server (PyPI installation) pmit connect npx \ -a "-y" -a "@modelcontextprotocol/server-github" \ -e "GITHUB_PERSONAL_ACCESS_TOKEN=your_token" \ --verbose # From source uv run pmit connect npx \ -a "-y" -a "@modelcontextprotocol/server-github" \ -e "GITHUB_PERSONAL_ACCESS_TOKEN=your_token" \ --verbose -
Everything Server (for testing notifications):
# Test server that sends regular notifications (PyPI installation)
pmit connect npx \
  -a "-y" -a "@modelcontextprotocol/server-everything" \
  --verbose

# From source
uv run pmit connect npx \
  -a "-y" -a "@modelcontextprotocol/server-everything" \
  --verbose
This server sends
notifications/messageevery 20 seconds, perfect for testing the notification system.
Server Capability Testing
The CLI commands automatically test server capabilities with enhanced display formatting:
Enhanced Resource Display
- Color-Coded Labels: Green names, cyan URIs, yellow descriptions, magenta MIME types
- Download Ready: Shows exact
download-resourcecommands for configured servers - Smart Guidance: Different messages for configured vs temporary servers
Example output for configured servers:
Testing Resources:
Found 3 resources:
Use 'download-resource my-server-id "<resource-name>"' to download any resource

  1. Name: config.json
     URI: file:///path/t
No comments yet
Be the first to share your take.