
mcp-webinar
Materials for a webinar about MCP (Model Context Protocol).
The project shows the same agent gaining tools five different ways, so you can see exactly what MCP adds over hand-written tools — and how auth fits in.
| # | Demo | Host app | MCP server |
|---|---|---|---|
| 1 | Custom tools, no MCP | host/app_custom_tools.py |
— |
| 2 | MCP over Streamable HTTP | host/app_mcp_no_auth.py (TRANSPORT="http") |
servers/http_server.py |
| 3 | MCP over stdio | host/app_mcp_no_auth.py (TRANSPORT="stdio") |
servers/stdio_server.py (auto-spawned) |
| 4 | MCP with API-key auth | host/app_mcp_auth.py (AUTH="api_key") |
servers/api_key_mcp_server.py |
| 5 | MCP with OAuth (Keycloak) | host/app_mcp_auth.py (AUTH="oauth") |
servers/oauth_mcp_server.py |
The agent always works against the mock User Service (search / read / create / update / delete users).
Setup
python -m venv .venv && source .venv/bin/activate
pip install -r requirements.txt

export OPENAI_API_KEY=sk-...          # required
# optional overrides: OPENAI_MODEL, MCP_API_KEY, *_URL (see commons/constants.py)

# mock User Service (all demos need it); Keycloak (only demo 5)
docker compose up -d userservice
Run every command below from the repository root.
Demo 1 — custom tools
python -m host.app_custom_tools
Demo 2 — MCP over HTTP
python -m servers.http_server          # terminal 1
python -m host.app_mcp_no_auth         # terminal 2  (TRANSPORT="http")
Demo 3 — MCP over stdio
Set TRANSPORT="stdio" in host/app_mcp_no_auth.py (the server is spawned for you):
python -m host.app_mcp_no_auth # choose "stdio" when prompted
This uses your servers/stdio_server.py entry point — simplest and most reliable for local development.
Step 1: Find the Claude Desktop config file
| OS | Path |
|---|---|
| macOS | ~/Library/Application Support/Claude/claude_desktop_config.json |
| Windows | %APPDATA%\Claude\claude_desktop_config.json |
Step 2: Edit the config
Open the file (create it if it doesn't exist) and add your server:
{
  "mcpServers": {
    "users-management": {
      "command": "{ABSOLUTE_PATH}/mcp-webinar/.venv/bin/python",
      "args": [
        "{ABSOLUTE_PATH}/mcp-webinar/servers/stdio_server.py"
      ],
      "env": {
        "PYTHONPATH": "{ABSOLUTE_PATH}/mcp-webinar"
      }
    }
  }
}
Important notes:
- Don't forget to replace
{ABSOLUTE_PATH}with the absolute path to the project on your local machine - Set
PYTHONPATHto your project root so imports likeserversandcommonsresolve correctly - If you're using a virtual environment, point to its Python binary:
On Windows:"command": "/path/to/your/venv/bin/python""C:\\Users\\you\\project\\.venv\\Scripts\\python.exe"
{
  "mcpServers": {
    "users-management": {
      "command": "/Users/pavlokhshanovskyi/my-courses/mcp-webinar/.venv/bin/python",
      "args": [
        "/Users/pavlokhshanovskyi/my-courses/mcp-webinar/servers/stdio_server.py"
      ],
      "env": {
        "PYTHONPATH": "/Users/pavlokhshanovskyi/my-courses/mcp-webinar"
      }
    }
  }
}
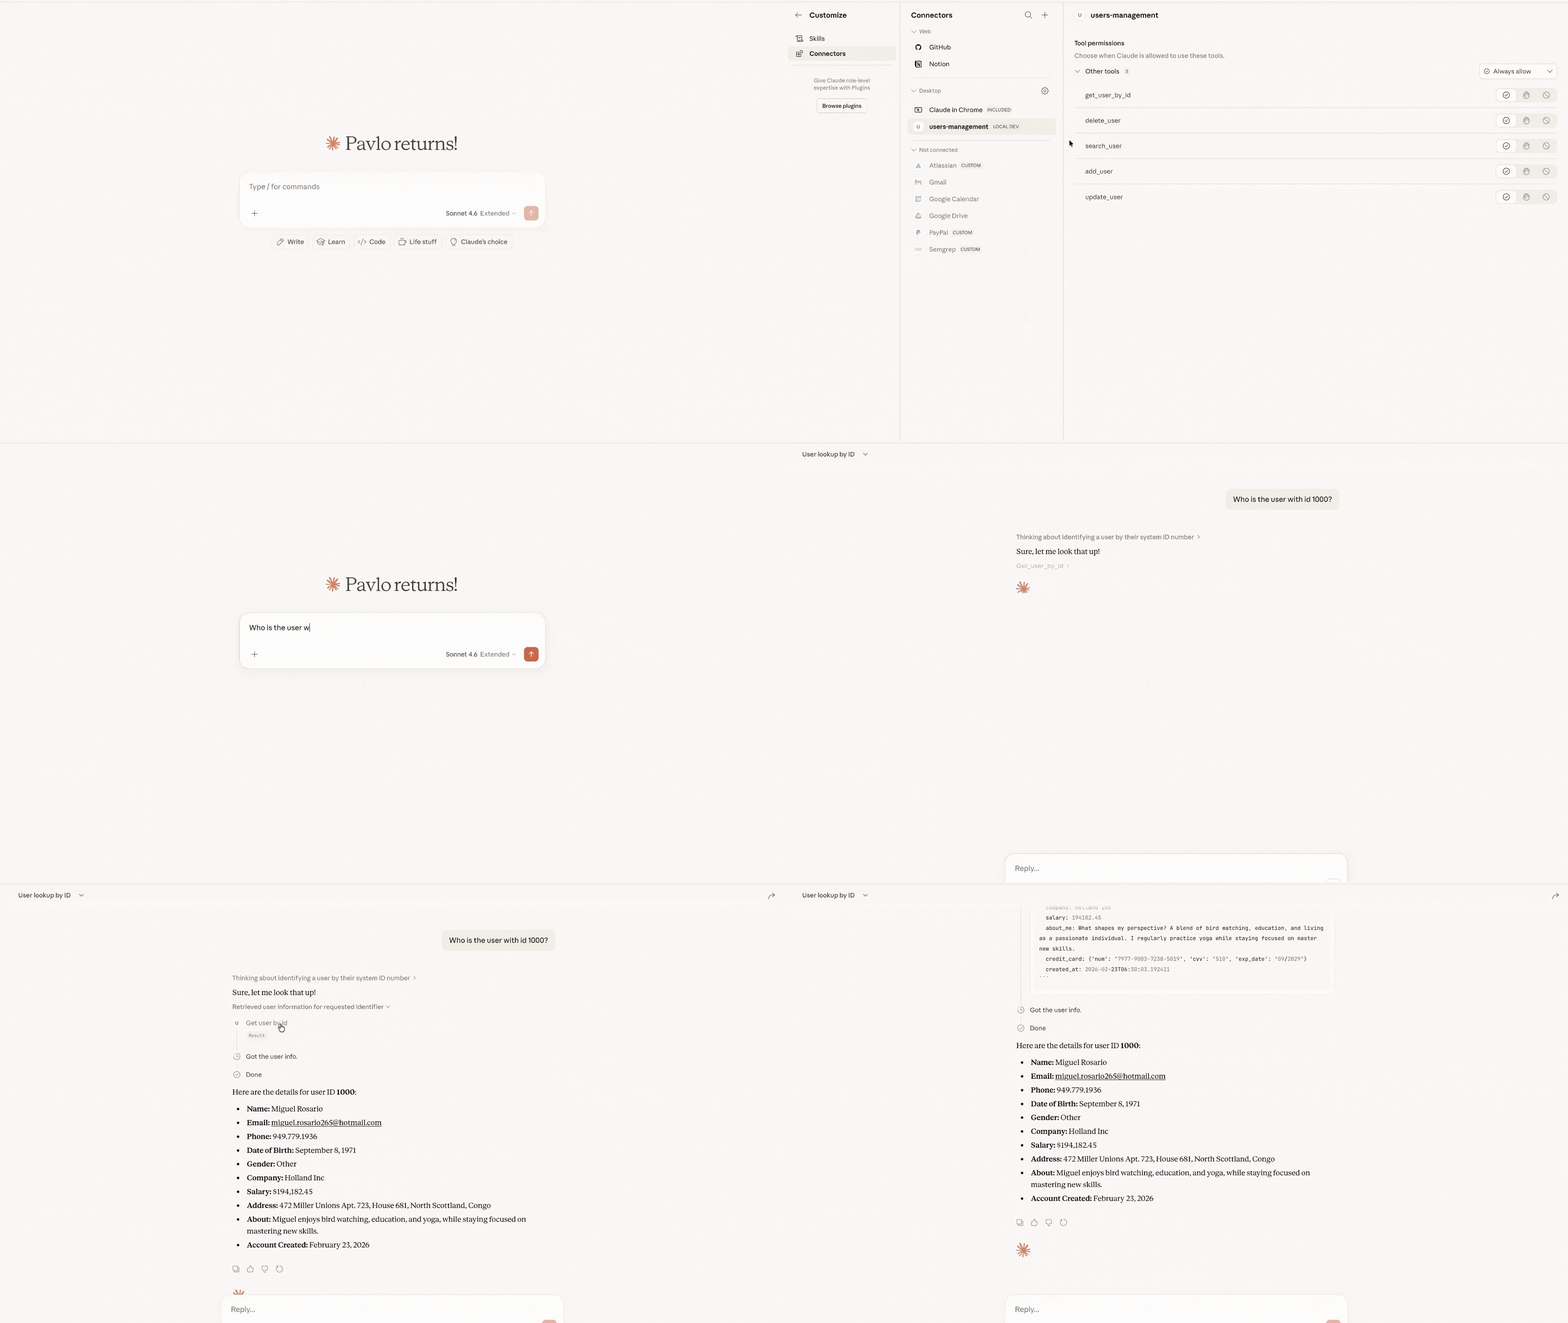
Step 3: Restart Claude Desktop
Fully quit and reopen Claude Desktop. While reopening, Claude can ask for access to the project. In the connectors section you will be able to find users-management.
Demo 4 — MCP with API key
python -m servers.api_key_mcp_server   # terminal 1
python -m host.app_mcp_auth            # terminal 2  (AUTH="api_key")
Demo 5 — MCP with OAuth (Keycloak)
docker compose up -d keycloak
python -m servers.oauth_mcp_server     # terminal 1
# set AUTH="oauth" in host/app_mcp_auth.py
python -m host.app_mcp_auth            # terminal 2 — opens a browser to log in
Log in as mcp-user / password (it has the required role). The server follows
the MCP Authorization spec — it advertises /.well-known/oauth-protected-resource/mcp
and challenges unauthenticated calls with 401 + WWW-Authenticate, so the client
discovers Keycloak on its own (no endpoints hardcoded in the client).
⚠️ Access-token TTL is 60s on purpose, so you can demo the automatic refresh.
→ See the Keycloak section for credentials, endpoints, users, and Postman setup.
Type exit (or quit) to leave any chat.
Keycloak
Keycloak is an open-source Identity and Access Management solution. It handles user authentication, issues JWT tokens, and manages roles/permissions — so your services don't have to implement any of that themselves.
In Demo 5 Keycloak is the Authorization Server in the OAuth 2.0 flow: it authenticates the user via a browser login page and issues a signed JWT access token that the MCP server validates on every request.
How the pieces map to the MCP Authorization spec in this project:
- Resource Server → the MCP server (
servers/oauth_mcp_server.py). It uses fastmcp'sRemoteAuthProvider, which automatically serves the protected-resource metadata athttp://localhost:8008/.well-known/oauth-protected-resource/mcpand answers unauthenticated requests with401+WWW-Authenticate. Token validation (JWKS signature, issuer, required role) lives inservers/auth/oauth.py(KeycloakRoleScopeVerifier, a thin subclass of fastmcp'sJWTVerifier). - Client → the host (
host/mcp_client.py,build_oauth). It uses fastmcp'sOAuthhelper, which discovers Keycloak from the server metadata, runs the PKCE browser flow, and refreshes tokens transparently — no Keycloak endpoints are hardcoded.
Admin Console
| URL | http://localhost:8089 |
| Username | admin |
| Password | admin |
Realm Configuration
The realm is pre-configured via _keycloak/mcp-realm-config.json.
On first startup Keycloak imports it automatically (start-dev --import-realm).
| Setting | Value |
|---|---|
| Realm name | mcp-realm |
| Client ID | mcp-client |
| Client type | Public (PKCE, no client secret) |
| Token TTL | 60 seconds ⚠️ (intentionally short to test token refresh) |
Keycloak Endpoints
| Endpoint | URL |
|---|---|
| Well-known / OpenID config | http://localhost:8089/realms/mcp-realm/.well-known/openid-configuration |
| JWKS (public keys) | http://localhost:8089/realms/mcp-realm/protocol/openid-connect/certs |
| Token | http://localhost:8089/realms/mcp-realm/protocol/openid-connect/token |
| Authorize | http://localhost:8089/realms/mcp-realm/protocol/openid-connect/auth |
The MCP server points clients at the realm above via its own protected-resource metadata:
curl http://localhost:8008/.well-known/oauth-protected-resource/mcp
Pre-configured Users
| Username | Password | Realm role | MCP Access |
|---|---|---|---|
mcp-user |
password |
mcp-tools-access |
✅ Allowed |
no-access-user |
password |
(none) | ❌ 401 Unauthorized |
(Optional) Test it in Postman
Postman connects directly to Keycloak (the authorization server) — the same endpoints
the MCP client discovers automatically. Create a new request → POST http://localhost:8008/mcp,
then open the Authorization tab:
| Parameter | Value |
|---|---|
| Auth Type | OAuth 2.0 |
| Grant type | Authorization Code (With PKCE) |
| Callback URL | see options below |
| Auth URL | http://localhost:8089/realms/mcp-realm/protocol/openid-connect/auth |
| Access Token URL | http://localhost:8089/realms/mcp-realm/protocol/openid-connect/token |
| Client ID | mcp-client |
| Code Challenge Method | SHA-256 |
| Scope | openid profile |
Both callback URLs are registered for mcp-client, pick one:
- Postman hosted (default):
https://oauth.pstmn.io/v1/callback— leave Authorize using browser unchecked. - Local:
http://localhost:9999/callback— check Authorize using browser.
Click Get New Access Token, log in as mcp-user / password, then Use Token and
send the request. The mcp-tools-access role is added to the token automatically (via
Keycloak's default roles scope) and the server authorizes on it — you do not request
it as a scope. Logging in as no-access-user yields a token without the role, so the server
returns 401.
No comments yet
Be the first to share your take.